Quantcast
Channel: MaxedTech
Viewing all 34 articles
Browse latest View live

UNi Xonar 1788 with original C-Media Audio Center b1 & b2 (experimental) – [closed]

$
0
0

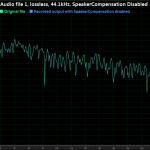
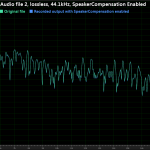
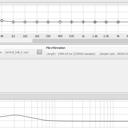
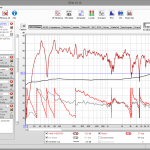
This is a experimental build that uses original C-Media Audio Center instead of Asus Audio Center. I began testing it from the DPC latency perspective, and thanks to Neker’s  feedback, it might be more to it than this. Besides having more settings it might also improve audio quality.  So anyone with free time and eager to contribute in making UNi Xonar drivers better, should check this out and report back your feedback even if its subjective.  Also someone that has RightMark Audio Analyzer  should give it try and compare these drivers output with UNi Xonar 1.0(1).

Some quick notes (updated 29.08.2010):

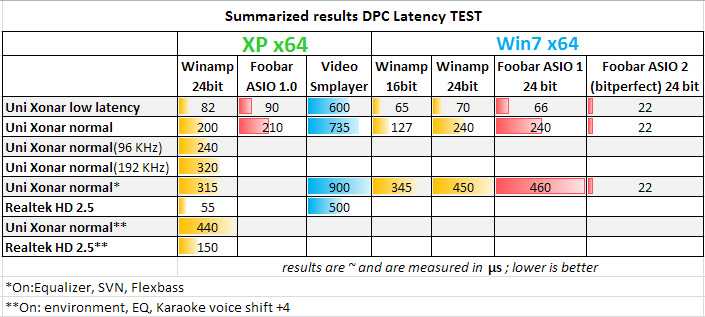
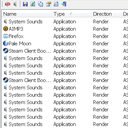
- DPC latency is low even with Control Center running in tray.

- DPC latency is lower even compared to UNi Xonar 1788 1.0 Low DPC latency . E.g. by enabling Dolby Headphones latency was ~410μs instead of ~500μs

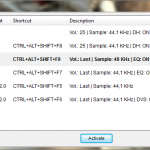
- Download  Sample rate switcher for XP here. You will need to restart or Disable and Enable the Asus Xonar Card from the Device Manager. A quick way to see if its working is to see if DPC latency is higher.

If it doesn’t change look at this guide 5. Finding setting path in the registry & modify .bat switchers to your system. Please report if you had to change the registry path.

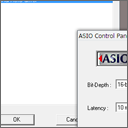
- This build still comes with ASIO 2.0, so you’ll have to install ASIO 1.0 Patch A if you used it previously .

Make sure you uninstall the previous drives, UNi Xonar 1.0 drivers may appear in Add or Remove Programs as UNi Xonar Audio


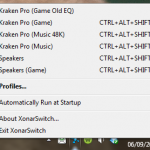
How to turn on GX mode (updated 29.08.2010):

1) Download and run one of these files (Right-click and Save (link) as).  XP or  Windows7

2) Download and run the corresponding  hsstart ***.bat file and add  it to Start->Programs->Startup for automatic startup. (thanks sl55)

If this doesn’t work. You may need to manually edit both .bat files. Guide is at 5. Finding setting path in the registry & modify .bat switchers to your system. Please report if you had to change the registry path.

Just as a reference, here is what Neker wrote ( “2 Win7″ =  “Uni Xonar 1788 C-Media Center b1 Win7″) :

Hi there carvedinside!

I did a fresh windows install to confirm the results of my previous tests.

I have ran the enhance.bat program. Apparently sound quality is the same, I mean, it does not seem to improve sound quality neither to have any effect. However I have not measured any potential increase in sound quality with any kind of software of other devices (im not really a sound techie but I trust to what I hear :p ).

Concerning your question: “Did you noticed a difference in sound quality without any audio functions enabled as well ?”
The answer is yes.

a) Sound quality is richer when i used the test build “2 Win 7″ with the “Oxigen HD configuration menu”. Sharp sounds in other builds are almost lost. And the quality of “bass” sounds is also better with the the test build “2 Win 7″. The true boost in sound quality comes by selecting 2 channels (audio input) and Dolby Prologic.

b) In your final builds, when I select “Dolby” through the “Asus configuration menu”, I do not have sound at all neither in the rear speakers nor in the front speaker (front right and left channels work… dont remember if the subwoofer works or not). In these builds, this is partially fixed by clicking in the “effects” window and adding a sound effect (for example the “Generic” effect). Another fix is to click “7.1 virtual speakers” in the main menu and have the sound of the loudspeakers circling around me, but it is crazy!
In summary, neither the rear speakers nor the front speaker work with other builds. They work using effects in the driver which somehow replicate the sound of the front right and left channels.

My conclusions:
The problem is that the Dolby option using the Asus configuration menu is not really creating 6 different sound channels, but only 2 channels: front left and front right (maybe subwoofer channel too, cant remember). Effects in the driver create the feeling that sound is generated for all speakers, but it is not. It is just replicating the sound of the front right and left channels and sending it through other speakers. Using the test build “2 Win 7″ (with the “Oxigen HD configuration menu”) the soundcard is creating 6 true sound channels. And this is really a big difference in sound quality. I get these results by using “Dolby” which is a technology designed to create different sound channels (so apparently Dolby is working perfectly in the test build “2 Win 7″).

Further thoughts:
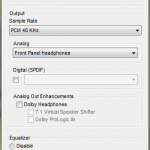
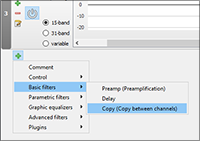
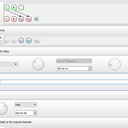
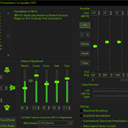
- In addition, the “Oxigen HD configuration menu” is richer than the ASUS configuration menu. It has more possible options and enhancements. For example, there is a blank square named “Panoramic” you can check under the “Dolby Prologic” settings (in the tab named PLIIx) which enhances sound quality. This is just to mention one feature which is lost in the Asus configuration menu.

- This information also could be helpful since the results of my tests could be affected by my specific hardware. My speakers are Logitech Z-5500 (http://www.logitech.com/en-us/speakers-audio/home-pc-speakers/devices/224). They come with a device to select the input channels, so I can select if input is “Direct” (this one using jack connectors) and “Optical”, “Coax” (these two with S/PDIF). I achieve the best sound quality using the following:

In the loudspeaker I select:
* Direct input (through jack connectors), 6 channels.

In the the “Oxigen HD configuration menu” i select:
* Audio input: 2 Channels
* Dolby Pro Logic (“Panoramic” enabled)
* 6 Speakers
* Audio output PCM

If the only difference between test build “2 Win 7″ and your final builds in the ftp is the configuration menu (Oxygen HD and ASUS), then, according to my experience the Asus configuration menu is crap, as you pointed out.

Hope the content of this email to be helpful. Also note that the results of my tests have been confirmed by reinstalling windows. However, different loudspeakers may not report the same results. I think my Logitech speakers have a Dolby decoder built in (not sure if this is relevant, but its good to let you know about it).

Download 1788 b1: here or 1790 b2: here


The post UNi Xonar 1788 with original C-Media Audio Center b1 & b2 (experimental) – [closed] appeared first on MaxedTech.


UNi Xonar 1821 1.71 drivers released

Xonar hardware mods

The case of DPC latency

$
0
0

Article update log

  • 16.03.2012: Added some quick tips to 4.Tips & tweaks in reducing DPC latency
  • 11.08.2010 : Added Win 7 & Asio results to 3.1 chapter (draft version)
  • 3.08.2010 : Part 1 (First Revision)


PART 1

 1. What is DPC latency?

“If any kernel-mode device driver in your Windows system is implemented improperly and causes excessive latencies of Deferred Procedure Calls (DPCs) then probably drop-outs will occur when you use real-time audio or video streaming applications” – http://www.thesycon.de/eng/latency_check.shtml

Basically if you are watching a movie and your computer has high DPC latencies, your audio/video will pause or skip for a couple of seconds. The same will happen with games.

The worst part is that those audio/video dropouts will occur regardless if you have a single core P4 2.4 GHz  processor or a quad core Core i7. Bad coding of the drivers is usually the fault for high and very high DPC latencies.

2. How do I check my DPC latency?

First you have to download and run the DPC latency checker from here.  Note that DPC latency varies depending on the applications you are running (foreground and background). And it’s mostly influenced by audio data streams, video data streams and network activity (wireless, ethernet, bluetooth) . But that’s not all, for example mouse movement also causes  DPC latency levels to rise.  When you use a P2P application and you watch a HD 5.1 movie, this can lead to a  very bad movie experience,  audio/video desynchronizations occurring several times during playtime.

3. Test Setup & Some Examples

Lets start with the test system:   Core 2 Duo 8400 3.0 GHz, DFI LP UT P35 motherboard,Marvell 1 GB Lan onboard, Realtek ALC885 audio onboard ,2×2 GB Ram, ATI HD 3870 video card, Asus Xonar DX sound card, Windows XP x64 (sp2), Windows 7 x64

 3.1 Asus Xonar DX vs Realtek ALC885 showcase

The tests where done with 5.1 channel/44.1KHz  settings except the cases where there are other settings specified . For comparison I also tested my on-board audio card Realtek ALC885 with Realtek  HD 2.50 driver

Results interpretation

Values are approximates . Values between 0-300 are good, 300-500 are OK,  500-1000 are bad and values >1000 are terrible.

Don’t compare Windows XP results with those of Windows 7. Windows 7 is a clean install where Windows XP is fully loaded with programs. After closing the programs that where running in the background, such as Rainmeter, the results for Uni Xonar low DPC latency on XP where 68 µs .

The results

As you can see Realtek did a pretty good job with their drivers, the differences are enormous between Realtek and ASUS/C-MEDIA drivers with the same settings. For those of you who don’t know, I made a version of the Xonar drivers (Uni Xonar low DPC latency) which disables Asus Audio Center from startup, resulting in a lower DPC latency at ~120µs . This doesn’t mean that if you disable autostartup for Realtek Panel you will get better results.  ASUS  Xonar drivers are special and issues pop-up where they shouldn’t.

 3.2 Network activity impact on DPC latency – showcase

Here are 2  examples where increased network activity rises DPC latency

a) µtorrent network usage:  10 KBps Download, 310 KBps Upload

utorrent-310-kb-up

b) µtorrent network usage:  4,5 MBps Download, 300 KBps Upload

utorrent-4-5-mb-dl-300-kb-up

PART 2

4.Tips & tweaks in reducing DPC latency

16.03.2012 – Sorry guys as I never got around to do the part 2 the way I previously intended.

If you have problems with high DPC latency, here are some quick tips:

  1. Update your drivers (especially audio, network LAN, WiFi, Bluetooth, TV tuner) , try searching for them on the original chip manufacturer and not on the motherboard manufacturers page.
  2. Disable unused components (like the LAN,on-board audio card, Bluetooth) via BIOS or Device Manager.
  3. Make sure you have your Windows updated
  4. Disable any motherboard/CPU monitors that autostart with windows (like GigaByte Easy Tune, Asus AI Probe and so on)
  5. Disable High Precision Event Timer (HPET)  if you are using Windows Vista, Win7 or Win8.
  6. Update your motherboard BIOS to the latest version.

A very good read in regards to updating drivers and different performance enhancements here (by Von Dach) .

The post The case of DPC latency appeared first on MaxedTech.

UNi Xonar Drivers 1.71 (post periodically updated)

$
0
0

POST updates changelog (new or updated stuff in the post will usually be marked in red):

UNi Xonar drivers are modded drivers for the following cards:

  • Asus Xonar: DG, DGX, DG SI, DS, DSX, D1, D2, DX, D2X, HDAV, HDAV Slim, ST, STX, Xense.

  • Other C-Media 8788 audio chip based cards: Auzentech X-Meridian & X-Meridian 2G; HT Omega Claro Plus, 2, Halo, eClaro; Razer Barracuda AC-1. (more…)

Introduction

UNi Xonar Features

FAQ & troubleshooting guide (updated 08.04.2013)

Useful tips & suggestions | Known issues & workarounds (updated 27.02.2013)

Having problems installing UNi Xonar drivers? Refer to this topic

Please note that these are modded drivers and there are limitations regarding how much the actual original drivers can be fixed this way.


A WORD ABOUT DONATIONS – Donation list here.

Let me first say that these drivers are free of charge for everyone. Those of you who appreciate my hard work and take pleasure in contributing, you can make a small donation (like 2 to 5$). Bear in mind you don’t donate for ASUS & C-Media intellectual property & work, you do it for the work that I have done.

CONTRIBUTIONS – Contributors list here.

Surely donating is not the only way you can support this project. You can submit your custom made skin, icon, application or any other little enchantments that can make UNi Xonar better. Lets not forget about spreading the word about UNi Xonar drivers and helping other Xonar owners.

RELEASE NOTES UNi Xonar 1818+ 1.7x

Release notes 1.71

Driver changes:

  • Updated audio driver to 1821 for Windows Vista/7/8  and 1816 for Windows XP.
  • Includes updated driver installer

UNi Xonar Installer changes:

  • Fixed some issues with Driver cleaning module
  • Improved and fixed some potential issues with UNi Xonar Installer

Known issues :

  • C-media Panel: Enabling and disabling “7.1 Virtual shifter” option disables stereo upmix. Use “Stereo upmix switch” to re-enable it or you can use the C-media Panel v1.62 addon (it will revert to an slightly older C-Media Panel version)
  • In some cases,  WASAPI exclusive playback is interrupted by playback from other audio applications. More details here.  Fix: If you don’t use S/PDIF, disable Digital Output from Control panel->Sound. It’s confirmed that the audio drivers included in 1.70 don’t have this issue.
  • Win Vista/7/8, there are reports that you cannot play sound through S/PDIF and headphones at the same time.

Release notes 1.70

Driver changes:

  • For Windows Vista/7/8 it includes 1818 audio drivers. For Win XP it includes 1814 audio drivers.
  • Includes updated versions of Updated C-media and Asus panels.
  • Fixed HTOmega Claro 2 driver support.
  • Fixed driver signature issues for the other non-Xonar cards that were present in previous release.

UNi Xonar Installer changes:

  • Added option to apply addons at driver installation.
  • Improved Low DPC Latency option. Now it allows access to C-media Panel as well. And Asus Audio Center won’t autostart after driver installation like it previously did.
  • Improved Driver Cleaning process. Now it will clean the Panel and HsMgr(GX) processes startup entries too.
  • Reduced the overall installer size (from 13MB to 7MB)
  • Replaced Windows XP driver installer with the same one thats being used in Windows 7. Please report if there are any malfunctions compared to previous UNi Xonar driver releases.
  • Removed “1777 drivers + Asio 1.0″.This option lives on as an addon.
  • Rev 2: Applied all UNi installer fixes from 1.71

Known issues :

  • C-media Panel: Enabling and disabling “7.1 Virtual shifter” option disables stereo upmix. Use “Stereo upmix switch” to re-enable it or you can use the C-media Panel v1.62 addon (it will revert to an slightly older C-Media Panel version)

Note about Windows 8.1 RTM compatibility

While current drivers (up to 1.71) work with Windows 8.1 , they are not fully compatible. C-media Panel is missing some options and its interface is a little bit different (it’s displaying its Win XP interface). I suggest you try XonarSwitch for changing the needed settings.

There might be some problems with WASAPI playback.

There is no ETA on drivers fully compatible with Win 8.1 update yet.


Highlights from previous driver releases

Read Previous Release Notes

Driver Downloads:

  1. UNi Xonar 1816/1821 v1.71    mirror   (latest)
  2. UNi Xonar 1814/1818 v1.70   mirror   
  3. UNi Xonar 1814/1815 v1.64  mirror    (proven stable)
  4. Older versions : v1.63 beta; v1.62 betav1.54 ; v1.61 ; v1.53

Official addons (how to):

  1. “1777 drivers + Asio 1.0″ aka “ASIO 1.0 Patch” ( info )
  2. C-media Panel v1.62 (fixes stereo upmix turning off)

Standalone apps for applying settings: 

Standalone apps pack  containing :

    1. Front panel switch v3.2*
    2. SampleRate switch v1.2*
    3. Microphone Array Enabler v1.1* (might be useful if you have an microphone array)
    4. HDAV HDMI enabler v1.0* (This application hasn’t been tested please submit feedback if it works or not; It appears it is not needed anymore)
    5. Acoustic Echo Cancellation enabler v1.0 *(useful for other Cmedia 8788 based cards that lack this setting)
    6. Stereo upmix switch v1.0*
    7. 7.1 virtual speaker shifter enhanced profile v1.0* mirror (profile created by Cu. This profile should enhance the effect of positioning in games when using Dolby Headphones and 7.1 virtual speaker shifter. Please provide feedback about this profile. Demo)
    8. Headphones ohm Amp switch v1.0 * ( works only with the cards that support this)

*All these apps are based on scripts created by Virus. Before running the files, close any audio source / application


Other apps:

    1. Front Panel switch new version* (ext link; ) (notes)
    2. ASIO settings viewer/changer (ext link)
    3. Audio re-starter for sound loop problem for Win Vista/7/8 (by Razord93 ; ext link)

The post UNi Xonar Drivers 1.71 (post periodically updated) appeared first on MaxedTech.

XonarSwitch Beta Testing

$
0
0

XonarSwitch is a new application that allows you to control various Xonar’s audio settings, define them as switchable profiles, and apply them on-the-fly without having to stop the audio playback.

The beta testing of XonarSwitch is taking place on the MaxedTech website, allowing the author of the application to gather user feedback from the UNi Xonar community and give its members the opportunity to try out the application and contribute to its growth and polishing.

Currently Supported Hardware:

ASUS

Xonar D1, DX, D2, D2X, DS, DSX, DG, DGX, Essence ST, Essence STX, Xense, Xonar H6

AuzenTech

X-Meridian 7.1, X-Meridian 7.1 2G

Currently Supported Operating Systems:

Windows XP and later, both x86 and x64.

Main features:

  • Ability to change the Sound Card settings on the fly by directly interfacing with the driver.
  • No DPC latency increase: although it sends commands directly to the Xonar driver, it does so only when a profile is activated and only for the settings that actually change. It doesn’t continuously poll the driver.
  • Ability to configure itself depending on the hardware it runs on, showing only the relevant options.
  • Fully customizable global keyboard shortcuts usable to switch profile even when in a full-screen applications like a game.
  • Supports Headphones Gain where applicable.
  • Easily clone a profile by editing the source profile and then changing its name.
  • Live mode allows to hear the effects of your settings in real time.
  • Very compact and portable: only one small EXE, currently just over 800K of size; no dependencies, no need for external DLLs, no need for a setup, drop it and launch it. It enables autostart by default on first run, which can be manually disabled by the user.
  • Built-in self-update code: it periodically checks for new versions and updates itself automatically.


Current Profile Settings:

  • Master volume: apply last used for the same combination of output panel and speaker type, or set a specific volume and balance.
  • SVN (Smart Volume Normalization): leave unchanged, enable or disable.
  • System Speakers: leave unchanged or set a new layout.
  • Sample rate: set a value among 44.1, 48, 96 or 192 KHz
  • Set an analog output option: same as Asus Control Panel, including switching between front and rear panel where applicable.
  • Exchange headphones left / right channels: leave unchanged, enable or disable.
  • Exchange center / bass channels: leave unchanged, enable or disable.
  • Exchange side / rear surround channels: leave unchanged, enable or disable.
  • Headphones Gain: set gain mode where applicable. On the Xense, Sennheiser mode is supported.
  • SPDIF Output: deactivate or activate, choice between PCM and relevant options (Dolby Digital and/or DTS Interactive depending on the card model).
  • Analog or Digital out enhancements: support for Dolby Headphones, Dolby Virtual Speaker, 7.1 Virtual Speaker Shifter, Dolby ProLogic IIx, DTS NEO:PC depending on the card model.
  • Each output channel volume (depending on the card capabilities and the analog output layout selected): don’t change or set a specific value.
  • Each input source (they differ based on the card model): Leave unchanged or set volume, balance, line-specific options, monitoring (where available)
  • Select the recording source.
  • Equalizer: don’t change, deactivate and activate, defining a 10 band profile. The sliders give precise feedback from -20dB to +20dB allowing for 1dB-accurate calibration.
  • FlexBass: deactivate and activate, setting the LTE crossover frequency as well as the speakers’ size.
  • AEC: enable or disable where applicable. AEC requires a particular voice DSP that some models don’t have and thus it’s not always present.


Screenshots:

XonarSwitch_PopupMenu XonarSwitch_Profile XonarSwitch_Profiles ZonarSwitch_Tooltip


Planned features

  • Adding support for the DG / DGX jack autosensing feature.
  • Suggestions by the community where feasible and when cost/benefit positive, after the application is stable on various hardware and software platforms.

Version History

0.9.33

Initial beta release

0.9.49

-Now the profile editor immediately reflects external changes when in Live Mode.
-Added a new menu option: Real Time Settings, which allows to change the audio card parameters similarly to what happens with the control panel, without having to reapply a modified profile.
-Removed a bug that would cause XonarSwitch to incorrectly show no profile active when an existing profile was modified.
-Changed the behavior of an existing warning about activating Live Mode on a profile with Headphones Amp Gain. Now it triggers also when the profile sets a master volume level higher than the current one.
-Fixed a bug that would prevent the NEO:PC setting from working in Live Mode.
-Fixed a bug that sometimes prevented key modifiers (CTRL/ALT/SHIFT)from being actually registered as part of a keyboard shortcut. As a consequence some global hotkeys would not work.

0.9.52

-Windows 8 compatibility hotfix. Thanks to lann094 for being really helpful in the troubleshooting process.
-Now the Equalizer retains and reapplies its previous configuration if you disable and re-enable it repeatedly during the same session.

0.9.83

-New: added support for Xonar D2 and D2X hardware. Many thanks to Nico H. for providing the required data and testing the experimental build.
-New: both Real Time Settings and the Profile Editor now fully support FlexBass.
-Dolby Headphones Room and Dolby Virtual Speaker Mode can now be selected instead of being forced to a default of “DH-3 Hall” and “Wide” respectively.
-Changed the program icon to avoid confusion in the system tray when ASUS control panel and XonarSwitch are running simultaneously. Please note that the new icon could take a while to show up in some circumstances because of the icon cache feature of Windows.
-Fixed a bug that would prevent Virtual Speaker Shifter from being correctly applied when Dolby Virtual Speaker was selected.
-Complete rework of the code that handles autostart on Windows Vista and later, to address the “Automatically Run at Startup” menu not being checked on Windows 8 while autostart is enabled. Thanks to lann094 for testing out the new code on his machine.
-Real Time Settings and the Profile Editor have received a restyle to better accommodate current and future new features.

Note: for the new features and the Virtual Speaker Shifter bug fix to work correctly with existing profiles, each of them has to be re-saved.

0.9.87

-Hotfix for Headphones Amp Gain not working in the Real Time Settings window.
-Hotfix for a crash that would occur when running XonarSwitch on a system that had no default output and/or input device. Thanks to Catnips for being really helpful during the troubleshooting phase.

0.9.104

-Added support for Auzen X-Meridian 7.1 and 7.1 2G. Thanks to David for helping out with the tests.
-Fixed a crash that would occur when DEP was set to “opt-out” and XonarSwitch wasn’t in the opt-out list.
-The Headphones Gain Mode can now be set to “Don’t change” when defining a profile. This is the new default value for this setting. Existing profiles will continue to work.
-Virtual Speaker Shifter has now a new option that allows to control which layout is loaded when VSS is enabled. Available options are: “Don’t Change”, “Default” and “Luis U’s positional layout”.
-DTS:NEO has similarly received a new option. Possible values: “Don’t Change” and “Deafult”.
-AEC has been experimentally enabled on Xonar ST, STX and Xense. On paper they have all the characteristics required to fully support AEC. If you own one of these cards please provide feedback on how AEC works on them.

0.9.107

-Hotfix for the erroneous “Successfully updated to version…” message on startup. The first time you launch this revision you’ll still get the message but things will work normally afterwards.
Please update manually redownloading from the link below, since this problem prevents the autoupdate feature from working.

0.9.109

-Hotfix for crash under Windows XP pre-SP3. Thanks to whood for reporting the issue and testing the hotfix.
Those experiencing the issue, please update manually redownloading from the link below, since this problem prevents the autoupdate feature from working.

0.9.110

-Hotfix for XonarSwitch crashing when switching analog outputs from the Real Time Settings window on those cards that don’t have a Headphones Amp. Thanks to Jose for reporting the issue.

0.9.113

-Hotfix for a crash occurring when opening the profiles window while the saved height and width are corrupt. Thanks to Jackalope for his help in pinpointing the cause and testing the solution.

0.9.192

-Added mixer support both in Profiles and Real Time Settings. It’s now possible, among other things, to tune every single output channel separately, select an input source, activate or deactivate monitoring, activate or deactivate line-specific options like microphone boost or alternate mic, etc.
-Added balance support both for master volume and input sources.
-On Windows Vista and onwards, all volumes are now expressed both in linear percentage and dB. On Windows XP, dB values are supported only for the individual output channels.
-Completely rewritten the autostart code. It should finally work reliably on all Windows versions.
A big thank you to Chris, who provided essential information about the D2X input mixer when I was at the prototype stage, and helped me big time with testing the working build on Windows 8.1 and the Xonar D2X.
All existing profiles need to be re-saved in order to work properly on this new revision. The first time you edit a profile created with previous builds, the option to explicitly set a master volume will be active regardless of how it was on the previous revision and will have to be manually set to “Use Last” if needed. That won’t happen on new profiles and profiles that have been saved with this build at least once.

0.9.207

-Hotfix for two distinct crashes happening on some Windows 7 systems.
Thanks a lot to Arindel for being amazingly patient during a particularly tedious troubleshooting process. Thanks to parhans for testing the solution on his system as well. Thanks to Chris for making sure the new code didn’t break D2(X) compatibility.

0.9.212

-Hotfix for a crash happening on some systems when setting audio channels to a value and then to “Don’t Change” while Live Mode was active.
-Fixed a bug that would cause Live Mode activation to be extremely slow on some systems.
Arindel earned another thank you by trying out several builds to check if they solved the reported issue.

0.9.214

-Fixed a bug that caused the headphones gain setting to be reset when any output option was changed while the selected analog output was “Rear Panel Headphones”.
-Greatly improved memory footprint management. Now any unused memory resource will be released to the system within one minute from its obsolescence.

0.9.257

-Fixed a crash that would occur on some systems (Vista and onwards) while enumerating input devices. Thanks to Propheticus for helping out with troubleshooting and being very patient in testing out different builds.
-Fixed a bug that would cause XonarSwitch to prompt the user that the Speakers were disabled while in fact they were not. A thank you both to Bill and Amurtigress for helping out with troubleshooting and tests.
-Redesigned the Profile Editor and Real Time Settings interface to better accommodate a growing amount of options without continuously increase the size of the interface itself.
-Added a “Don’t change” option both for equalizer activation and gain profile. This revision is compatible with profiles created with previous versions, even though they will all explicitly set an Equalizer activation condition and Gain Profile. To use the new features and leave equalizer parameters unchanged, a profile needs to be modified accordingly and saved.
-Added support for Xonar H6 daughterboard. XonarSwitch will now detect the presence of the board and unlock the extra analog output options on supported cards (currently only the Essence ST).
-Added support for running XonarSwitch under normal user accounts. The app will now request elevated privileges only if the logged on user is an administrator, and run unelevated otherwise.
-Modified the autoupdate feature to make it compatible with normal user accounts. When an update is available and XonarSwitch detects it’s running unelevated, it will prompt the user to manually launch the update procedure and only the Updater module will request administrative privileges to overwrite the existing executable. The new and updated XonarSwitch will then run unelevated again. Please note that upon updating XonarSwitch from a revision older than 257, the new executable will inherit elevated privileges from the old revision that launched the update chain, and run with administrative rights until stopped and restarted. This will happen just once.

0.9.299

-Slightly changed color combination on the Profile Editor and Real Time settings tabs to achieve better visibility under some visual themes.
-Increased control width on some labels of the Profile Editor / Real Time Settings window to avoid truncation on unthemed Windows XP.
-Added support, both in profiles and Real Time Settings, for the following options: Smart Volume Normalization (SVN), Exchange Headphones Left / Right Channels, Exchange Central / Bass Channels, Exchange Side / Rear Surround Channels.
-In the tray icon tooltip, replaced the card model with the current master volume level.
-Now left clicking once on the tray icon will display a volume popup with controls for master volume level, balance, SVN and mute.
-To avoid volume spikes when swtiching to a profile with a higher volume lavel, master volume is now muted before applying the new profile settings. Master mute is then restored to its previous state after profile switching is complete.

Credits

The words “ASUS”, “ASUSTek”, “Xonar”, the Xonar logo and the original Xonar icon are © ASUSTeK Computer Inc.

Virus is the author of the Standalone Apps scripts source that got me started with this project.

One of the 7.1 Virtual Speaker Shifter layouts used by XonarSwitch is by Luis U and guarantees an optimal perception of 3D positioning in games.

The Xonar Icon with a transparent background is by bullseye.

Disclaimer

Although the code has been written with care, it’s still a beta application, and like all software in general and beta software in particular is by definition prone to defects. The author can’t exclude that some malfunctioning in the application could cause sensible settings like the system master volume or headphones gain to be misapplied and thus cause damage to your hearing or the audio equipment.

The software is provided as-is and free of charge, and by downloading the application and executing it, you explicitly declare the author is not responsible for whatever damage may be caused by the use of XonarSwitch.

Currently supported features might be dropped if the beta testing phase feedback reveals technical problems unforeseen by the author during the development process.

No malicious software guarantee

XonarSwitch is guaranteed free of malicious code. It has been tested and whitelisted by WebRoot.

Beta feedback guidelines

Beta feedback is essential to get XonarSwitch to run smoothly on all software and hardware platforms.

When reporting a bug, please follow these guidelines:

  • Always include your system info. Right click on the XonarSwitch tray icon, click on “About XonarSwitch…” and then on “Copy System Info” and then paste the data in your message.
  • Provide step-by-step instructions to reproduce the error / wrong behavior.
  • Be ready to test a private release that attempts to address the problem you reported.

Please note that during beta, feature requests will have very low priority, since the development focus will be on getting rid of bugs. If the general feedback by the community is positive and the application reaches a state of reasonable reliability, they will be taken into consideration later on.

How to contact the author

Right-click on XonarSwitch’s tray icon and then on the “About XonarSwitch…” menu.
In the about window, clicking on the developer’s name  will open your e-mail client with his mail address in the recipient field.


Download

The post XonarSwitch Beta Testing appeared first on MaxedTech.

Website updates

$
0
0

24-Sep-2013

Last week I’ve made a major update to the website. Along with the obvious new interface, I’ve made some loading optimizations that should speed up the page loading speed considerably and I’ve added some new features to the website.

I will start publishing IT articles soon, but everything (UNi) Xonar related will be under UNi Xonar menu item (I’ve yet to make the changes in this regard).


Notable changes:

  • Added RSS feed for comments on a specific page (RSS blue icon at the top of the comment section). You can now subscribe to RSS feeds for comments on a desired page you want to follow.
  • Improvement Recent Comments widget (on the right sidebar). Recent comments shown will depend on the type of the page you are viewing:
    • for home page – recent comments from all post/pages
    • for category – recent comments from pages under that specific category
    • for page – recent comment on that specific page

    For home or category pages, hovering over a comment author will display the page title where the comment was made.

  • Removed Social Login in comments ( ability to login to comment with Facebook, twitter, WP account). The previous system had to go. I am still debating whether its actually useful to add a replacement system or not.
  • New website is made for modern browsers. Browsers IE6 & IE7 are not supported anymore for viewing this site. IE8 is the minimum version compatible with the new design.

Known issues with the new website:

  • Opera Mini for “classic” phones – site is zoom out
  • For mobile browsers: Some items may be overlapping one another (like comment pagination and RSS comment feeds button).
  • In some cases the width of the page isn’t properly correlated with the length of the browser window (page refresh will fix this).
  • In some cases on desktop browsers , menu and sidebar are shown as in mobile version (page refresh will fix this)  .

If you find issues or annoyances viewing this website you can post them here. Thank you.

The post Website updates appeared first on MaxedTech.

UNi Xonar 1822 1.72 drivers released


About Test Mode and Disable Driver Signature Enforcement (updated 22 Feb 2015)

$
0
0

Some modified drivers lack a valid driver signature and this prevents them from being installed on a 64-bit Windows OS. To bypass this restriction and be able to install those drivers you need to run Windows in Test Mode or boot Windows with “Disable driver signature enforcement” option. These methods are only needed for x64 versions of Windows Vista, Windows 7, Windows 8, Windows 8.1 or Windows 10.


1. Test Mode method

How to enable Test Mode

Download this package. Unpack and run “1. enable testmode.bat” file as administrator (right click on it and click Run as administrator). Restart PC.

or

Press Start->Search->cmd  then right-click on it and click Run as administrator. In the CMD window type or copy this bcdedit /set testsigning on and press enter. Restart PC.

Remove the Test Mode watermark from desktop.

For Windows 7 check this guide on how to remove the TestMode watermark from the desktop.

For Windows 8/8.1/10 download this tool.

How to disable Test Mode

Note: If you disable test mode while you have drivers installed that need test mode(unsigned drivers) those drivers will stop functioning.

Download this package. Unpack and run “disable testmode.bat” file as administrator (right click on it and click Run as administrator). Restart PC.

or

Press Start->Search->cmd  then right-click on it and click Run as administrator. In the CMD window type or copy this bcdedit /set testsigning off and press enter. Restart PC.

2. Disable Driver Signature Enforcement method

You could try this method if you don’t want Windows to always run in Test Mode. Compared to always running Windows in Test Mode, “Disable driver signature enforcement” method needs to be applied  each time you install a new driver that is unsigned and might be problematic on Windows 7.

How to disable driver signature enforcement

Simple way (in some cases it might not work or require some additional steps in Windows 8/8.1/10):

  1. Restart PC
  2. Press F8 repeatedly just after UEFI/BIOS intialization and just before Windows would load
  3. Select “Disable driver signature enforcement” option.
  4. Install drivers. After you restart your system again you won’t be able to install unsigned drivers until you repeat the steps 1-3.

or

Alternative way for Windows 8.1 and Windows 10:

  1. In Windows go to PC settings (you can search for it in Start).
  2. Click on “Update & recovery” on the left side.
  3. Click on “Recovery” on the left side.
  4. Click “Restart Now” button under Advanced startup.
  5. Select Troubleshoot ->Advanced setup -> Startup Settings and press Restart
  6. Press 7 number key corresponding to “Disable driver signature enforcement” entry.
  7. Install drivers. After you restart your system again you won’t be able to install unsigned drivers until you repeat the steps 1-6.

Notes about “Disable driver signature enforcement”

A downside to this method is that the possibility that an unsigned driver that’s been previously allowed to load to randomly not be allowed to run anymore. In this case you need to reinstall the drivers again after you’ve booted the system with “Disable driver signature enforcement”. Causes for this are unknown.

You can reinstall with uninstalling the same unsigned driver without booting the system with  “Disable driver signature enforcement” option.

On Windows 7, this method might not allow drivers to load after you’ve booted Windows normally. Unfortunately I can’t check this, so your feedback is welcomed.


3. Comparison between “Test Mode” and “Disable driver signature enforcement” methods

 Test mode  Disable driver signature enforcement
installation  + set it and forget it  – redo it each time
security  – always allows installation of other unsigned drivers, this allowance could be used to install malicious drivers that would be unsigned, this is a very rare possibility and should not be a problem for a system running a antivirus or a cautious user.  + does not permanently allow the installation of unsigned drivers
additional setup  – watermark on desktop that requires additional steps in order to hide it. + no watermark on desktop
– drivers may stop functioning requiring that you reinstall them


Related search terms: windows 10 test mode ,  disable driver signature enforcement Windows 10 , windows 10 enable test mode ,  how to enable test mode windows 10

The post About Test Mode and Disable Driver Signature Enforcement (updated 22 Feb 2015) appeared first on MaxedTech.

UNi Xonar 1823 1.80 drivers released

UNi Xonar W10 1825 1.81 drivers released

$
0
0

UNi Xonar W10 1825 1.81 drivers are released. Full changelog and download links here.


Release notes 1.81a

Driver for all supported cards. Includes 1825 audio drivers for Windows 10. Unlike previous releases, the 1825 audio driver will only work in Windows 10.

Driver changes:

  • Windows 10: Updated audio driver to 1825 (built date: 22 ‎June ‎2016, made by C-Media).
  • Updated C-Media Panel.

Other notes:

  • Replaced C-Media driver uninstaller with UNi Xonar driver cleaner.

Rev. 2 changes:

  • Added support for STXII cards in Asus Audio Center, cards will be detected as STX by Asus Audio Center but feature wise everything should be there.

Known issues:

  • 1825 audio drivers have an issue when the audio card is uninstalled, disabled or the drivers are overwritten, resulting in a system crash. In order to avoid the uninstall system crash I’ve come up with a workaround  that’s presented below
  • Asus Audio Center: GX button is no longer showing. It has to do with 1825 audio drivers and there may be a reason why C-Media removed it. I’m not sure if it’s worth it to bring the GX on/off control back.

Possible issues:

  • For STX II cards XonarSwitch might not work. Need more feedback on this.

How to uninstall 1825 v1.81 drivers: In order to avoid a system crash while uninstalling 1825 drivers you will need to play an audio file before proceeding with the uninstall process. Restart system after the uninstall process is done.

The post UNi Xonar W10 1825 1.81 drivers released appeared first on MaxedTech.

Web apps and services list

$
0
0

List of web applications and services that you may find to be useful. Among the topics covered are design, firewall and router testing, browser security testing, online accounts breaches. This page will be periodically updated.

History

  • 05 Oct 2017: Added Jotti Malware Scan and Hybrid Analysis to Online antivirus scanners.
Design and photo manipulation:
  • PIXLR Editor – Web based alternative to PhotoShop. Work in layers, replace color, transform objects, and more – all from your browser.
  • PIXLR Express – Apply a quick fix or add a personal touch with creative effects, overlays, and borders to pictures.
  • Sketch and Color – Make sketches and portraits from pictures.
Firewall testing and PC/router security checking:
  • Shields UP! – Scan for open ports on your local PC. Universal Plug n’Play (UPnP) Internet Exposure Test.
  • F-Secure Router Checker – Check your device’s connection to its DNS resolver, to make sure it is connecting to an authorized DNS server. A mismatch between the two may indicate DNS hijacking is underway.
  • Router Crash Test – Check if your router is susceptible to crashing from DNS requests.
  • SG Security Scan – Remote port scanner that audits a number of commonly used ports on your system in order to detect potential security vulnerabilities.
Browser security and privacy:
  • BrowserLeaks – Find out what personal identity data may be leaked by your browser.
  • IPLeak – Find out if your VPN leaks your IP address.
  • ProxyDB Anonymity Check – Check your current anonymity level of your connection when using proxy or VPN.
Online antivirus scanners:
  • VirusTotal – Analyzes suspicious files and URLs and facilitates the quick detection of viruses, worms, trojans, and all kinds of malware.
  • Hybrid Analysis – Free automated malware analysis service.
  • Jotti Malware Scan – Free service that lets you scan suspicious files with several anti-virus programs.
Internet connection:
  • IP-v6 Test – Check your IPv6 and IPv4 connectivity and speed. Website IPv6 accessibility validator.
Online accounts security:
  • Have I been pwned – Check if you have an account that has been compromised in a data breach and where possible which of your personal details were compromised (user name, password, password hints, etc.).
  • BreachAlarm – Find out if a password hack has exposed your e-mail password online.
Internet speed test:
  • SpeedTest.net – Test your download, upload and latency against servers from all across the world.
  • DSLReports Speed Test – Test your download, upload, latency and BufferBloat(info, FAQ) of your internet connection.
Display testing and calibration:
  • Lagom LCD Test – Calibrate brightness, contrast, clock/phase, sharpness, and gamma settings of the monitor.
  • Blur Busters Test UFO – Frame skipping check for display overclocking,  screen tearing and stuttering simulations with VSync and GSync video options.
  • Dead Pixel Buddy – Various colored backgrounds to help find dead pixels on a display.
Hardware testing:
  • Fossil CPU Load – Simulates partial or full load for 1 CPU core. Useful to check the processor’s TDP at a specific load or to tune processor’s performance state on a specific load.
Web browser benchmarks:
  • Peacekeeper – Universal browser performance test.
  • WebXPRT – Measure browser performance in HTML5 and JavaScript based workloads.
  • OortOnline.gl – Measure the performance of your WebGL compatible device or browser.
  • Basemark Web 3.0 – Measure browser performance in JavaScript, JavaScript frameworks,  WebGL 2.0, DOM, CSS.
Web domains performance and SEO check:
  • Pingdom Website Speed Test – Test the load time of a web page, analyze it and find bottlenecks.
  • GTMetrix – Analyzes your site’s speed and provides recommendations on how to optimize it.
  • SeoSiteCheckup – SEO checking and advices for domains.
Web domains and IPs information:
  • who.is – Whois, website info, history, DNS records, diagnostics for web domains and IPs.
  • downanalyze – Check if a website is down just for you or everyone.
Internet archive services:
  • archive.org – Browse archived web pages or take a snapshot of a web page for public keeping.
  • archive.is – Browse archived web pages or take a snapshot of a web page for public keeping.
Convert files:
Website privacy check:
  • WebbKoll – This tool helps you check what data-protecting measures a site has taken to help you exercise control over your privacy.

The post Web apps and services list appeared first on MaxedTech.

Xonar drivers disable SpeakerCompensation tweak testing

$
0
0

What it does (updated 03 Aug 2017)

This tweak disables the SpeakerCompensation driver setting, this setting is enabled by default and not accessible through Asus/C-media Panel. The purpose of SpeakerCompensation was unknown but from what I was able to deduce, when enabled, SpeakerCompensation is altering the sound output by modifying the amplitude of sound frequencies. By disabling it, early indications show that the sound output may be closer to the source file. Disabling SpeakerCompensation also results in a lower DPC latency. There may be other benefits or drawbacks that are yet to be discovered.

I invite you to test this tweak and submit your findings and impressions. I’m interested in hearing if you find the sound quality to be better after disabling “SpeakerCompensation” and if you consider that this tweak should be applied by default with UNi Xonar drivers.

Tweak works for the all the UNi Xonar supported cards:

  • Asus Xonar: DG, DGX, DG SI, DS, DSX, D1, D2, DX, D2X, HDAV, HDAV Slim, ST, STX, STX II, Xense.
  • Other C-Media CMI8788 audio chip based cards: Auzentech X-Meridian & X-Meridian 2G; HT Omega Claro Plus, 2, Halo, eClaro; Razer Barracuda AC-1.

Page updates

  • 16 Oct 2017: Updated “Audio frequency analysis”. Added “Possible performance problems” section.

How to apply the tweak

For easy switching between enabled and disabled, it’s recommended that you use UNi Xonar v1.80 or older drivers.

  • Download and extract this file.
  • Run “disable SpeakerCompensation.exe”.
  • For v1.80 and older drivers: Close any application that uses the soundcard and run “restart card.exe”. You would hear the card popping if the restart went through, if you didn’t hear that then restart the PC.
  • For v1.81 drivers: Restart the PC. Do not run “restart card.exe” as it will result in a blue screen.
How to restore to the default behavior
  • Run “restore SpeakerCompensation.exe”.
  • For v1.80 and older drivers: Close any application that uses the soundcard and run “restart card.exe”. You would hear the card popping if the restart went through, if you didn’t hear that then restart the PC.
  • For v1.81 drivers: Restart the PC. Do not run “restart card.exe” as it will result in a blue screen.

Audio frequency analysis (updated 16 Oct 2017)

On my Xonar DX card using a short loop cable I’ve recorded the playback of various melodies with SpeakerCompensation enabled and disabled. For each recording I’ve generated a FFT analysis spectrum and compared it to those of the original files. I’ve observed that when SpeakerCompensation is enabled it significantly decreases the amplitude of the frequencies that are above 21200 Hz and slightly alters other frequencies.

For an easier comparison I’ve made a audio file with the right channel from original file and the right channel from each recording. I’ve aligned each track(channel) of the resulted files so that they where exactly the same and then generated the FFT analysis spectrum of a specific segment. You can check some of the resulted FFT analysis spectrums done with Adobe Audition below. Images will be resized for screens below 1920x1080px so you might want to save and view them locally.

Beside the obvious amplitude decrease of the frequencies that are above 21200 Hz, when comparing the FFT spectrums it looks like sometimes the recording with SpeakerCompensation disabled is more in line with the original file, and sometimes the recording with SpeakerCompensation enabled seem to be.

Some of these difference could be recording artifacts. These recordings where restricted to my Xonar DX card’s playback and recording capabilities so better audio cards could produce more accurate recordings. Different audio tracks or segments could show different results. I may do other FFT spectrums of different audio files later, the process of doing these FFT spectrums is very time consuming.

On the topic of of the frequencies above 21200 Hz (21.2 kHz), I’ve read that commonly stated range of human hearing is 20 Hz to 20 kHz, but not all of us can hear up to 20 kHz and that some can hear above 20 kHz . So if frequencies above 20 kHz can’t be heard then why bother decreasing them? Is there any benefit of doing this? Maybe someone from the community can help here.

Audio quality (Work in progress)

The majority of the people that provided feedback so far, reported that the tweak improves the sound quality with the sound being richer, more clearer and detailed. Not everyone will notice a improvement in sound quality. The combination of ones hearing capabilities (check these tests), type of music they listen to and speakers/headphones performance are the determining factors in whether you can hear an improvement with this tweak or not.

Other people’s input is welcomed. Please check the feedback guidelines.

Right Mark Audio Analyzer (RMAA) tests

RMAA tests that I’ve done on my Xonar DX with a audio loop cable didn’t show any consistent differences between “SpeakerCompensation” being disabled and enabled.

Possible performance problems

There is a small possibility that on some systems the performance is affected by applying this tweak. Only 2 people reported such behavior.

I’ve ran multiple game tests on my PC and there where no FPS difference, no FPS drops or freezes between having SpeakerCompensation disabled and enabled. On Windows 7 with UNi Xonar v1.80a I’ve tested Dota 2 and Mafia 2, on Windows 10 with UNi Xonar v1.80b I’ve tested Hitman 2016 (DX11 and DX12) and Prey 2017.

At the moment we don’t know what causes the performance issues, but probably these are caused either by some specific audio settings or in conjunction with specific hardware. Anyone having performance problems when SpeakerCompensation is disabled please tell me the following information which audio driver version you have installed, panel configuration, number of speakers/channels, analog or digital(S/PDIF) output, card sample rate, CPU, videocard, OS.

DPC Latency results

DPC latency tests showed a 10-25% lower DPC latency that’s been generated by the use of the Xonar sound card when SpeakerCompensation was disabled. Results vary depending on other soundcard settings that are used and OS being tested.  Some tests I ran:

  • Windows 7, measured with DPC Latency Checker, network disabled, UNi Xonar v1.80b Low DPC Latency, Aimp audio player, avg. DPC latency results – DPC Latency in idle(10us):
speakercompensation 2.0 analog 5.1 analog 7.1 analog 7.1 analog with ASUSAudioCenter
disabled 20 36 41 115
enabled 25 45 57 134


  • Windows 10, measured with LatencyMon, UNi Xonar v1.80b Low DPC Latency, 2.0 analog output, Aimp audio player, 2 min audio playing, results for STXII.sys:
speakercompensation DPC count Highest execution(ms) Total execution(ms)
disabled 59997 0.066098 1034
enabled 65087 0.073767 1154

Feedback guidelines

When submitting feedback please include the following: audio card, audio driver version, Windows version, settings used (analog or digital output, number of channels, any other relevant settings that where enabled), speakers and amp or headphones model, music format (lossy or lossless).

With “SpeakerCompensation” disabled I am also interested in knowing up to which frequency you can hear (see tests here).


The post Xonar drivers disable SpeakerCompensation tweak testing appeared first on MaxedTech.

Xonar drivers increase microphone volume by 3 dB tweak

$
0
0

What it does

This tweak increases microphone volume input by 3 dB which can be considered as a 10-15% increase when recording the voice through the microphone and as up to 40% increase when recording from high volume sources.

I invite you to test this tweak and submit feedback. I’m interested in hearing if you find the mic volume increase useful and if you consider that this tweak should be enabled by default with UNi Xonar drivers.

Tweak works for the all the UNi Xonar supported cards:

  • Asus Xonar: DG, DGX, DG SI, DS, DSX, D1, D2, DX, D2X, HDAV, HDAV Slim, ST, STX, STX II, Xense.
  • Other C-Media CMI8788 audio chip based cards: Auzentech X-Meridian & X-Meridian 2G; HT Omega Claro Plus, 2, Halo, eClaro; Razer Barracuda AC-1.

How to apply the tweak

  • Download and extract this file.
  • Run “apply.exe”.
  • For v1.80 and older drivers: Close any application that uses the soundcard and run “restart card.exe”. You would hear the card popping if the restart went through, if you didn’t hear that then restart the PC.
  • For v1.81 drivers: Restart the PC. Do not run “restart card.exe” as it will result in a blue screen.
How to restore to the default behavior
  • Run “restore default.exe”.
  • For v1.80 and older drivers: Close any application that uses the soundcard and run “restart card.exe”. You would hear the card popping if the restart went through, if you didn’t hear that then restart the PC.
  • For v1.81 drivers: Restart the PC. Do not  “restart card.exe” as it will result in a blue screen.

Microphone input volume detailed results and observations

Using a loop cable between microphone and analog output I’ve recorded the input of 2 files, one was a voice file at volume level of someone speaking in the microphone and another file was a melody at a higher volume. I’ve used ocenaudio program to record, adjust those recordings so that they where the same length and contained the same playback segment and finally to generate statistics of RMS power.

RMS Power Driver default (dB) Tweak applied(dB) Difference (dB) Difference (%)
Voice file

at microphone

voice volume

min -55.84 -54.33 1.51 2.7
max -25.44 -22.47 2.97 11.67
avg -33.59 -30.57 3.02 9
Music file at

higher volume

min -30.66 -27.84 2.82 9.2
max -8.49 -5.48 3.01 35
avg -19.12 -16.12 3.00 15.7
where 0 is maximum

The percentage results are only there because it’s a easy to understand figure, the actual volume increase is not percentage based.

Voice file Minimum RMS Power results show that low volume sounds (as background noises are) are increased by a smaller amount with the tweak, which is a good thing.

The minor problem that probably won’t affect anyone

For sounds louder than -4dB the increases are variable, so if you were to record some high volume sounds that have noises both above -4dB and between -4 and 0 dB you should not apply this tweak as the recorded sound won’t be a accurate representation since not all sounds will be increased by the same amount.

Sounds between Volume increase by

(aprox)

-30dB to -4dB 3dB
-4dB to -3dB 2.4dB
-3dB to -2dB 2dB
-2dB to -1dB 0.6dB

Waveform comparison

In the image below I’ve overlapped the two waveforms resulted from recording playback of a music file using a loop cable between microphone and analog output. Output volume was 8%. Microphone input volume was 100% with “Microphone boost” active.

Xonar Microphone Volume Tweak Comparasion

Feedback

When submitting feedback please include the following: audio card, audio driver version, Windows version.

The post Xonar drivers increase microphone volume by 3 dB tweak appeared first on MaxedTech.

Web apps and services list for web developers

$
0
0

List of web applications and services that could prove useful for web developers. Among the topics covered are various CSS code generators, file type conversion tools,  website reports for performance, security, accessibility, SEO and other metrics. This page will be periodically updated.

Sprite generators
  • Retina Sprite Generator – Generate retina and standard sprite images online. Get your retina ready CSS codes instantly.
Design
  • CSS3 Patterns – Browse and edit gallery of pure CSS patterns.
  • Patternify – Design patterns and save them as a PNG image or as Base64 encoded image for CSS use.
  • PIXLR Editor – Web based alternative to PhotoShop. Work in layers, replace color, transform objects, and more – all from your browser.
  • PIXLR Express – Apply a quick fix or add a personal touch with creative effects, overlays, and borders to pictures.
CSS code generators
Conversion tools
  • ICO Convert – Icon maker and favicon generator. Create a multi-size Windows icon from different png images.
  • Base64 Image – Convert images to Base64 encoding so they can be embedded using img tags or CSS, speeding up load times for smaller images by preventing additional HTTP requests.
  • Vectorizer – Convert raster images like PNGs, BMPs and JPEGs to scalable vector graphics (SVG).
Media queries
  • MQtest – A tool to help identify which media queries your device responds to.
Regular expressions tools
  • Debuggex – Online regex tester with regular expression visualization.
  • RegexTester – Online regex tester.
Website performance, security, mobile friendly and other checks
  • Pingdom Website Speed Test – Test the load time of a web page, analyze it and find bottlenecks.
  • GTMetrix – Analyzes your site’s speed and provides recommendations on how to optimize it.
  • Google PageSpeed Insights – Identify ways to make your site faster and more mobile-friendly. Automatically generates minified HTML, CSS, JS files and optimized image files.
  • Sonar – Check websites for security, accessibility, interoperability and performance issues.
  • Google Mobile Friendly Test – Check if your web page is mobile-friendly.
Website privacy
  • WebbKoll – This tool helps you check what data-protecting measures a site has taken to help you exercise control over your privacy.
Website SEO

The post Web apps and services list for web developers appeared first on MaxedTech.


How to use one soundcard with up to 4 pairs of stereo speakers

$
0
0

Guide on how to use up to 4 pairs of stereo speakers with one 7.1 soundcard without using audio jack splitters. If you where to use jack splitters then you could connect many more speakers. This guide is useful for those who want to place speakers in multiple rooms or for those who want to make use of multiple speaker pairs when playing audio. Below are presented multiple ways to achieve this.


Contents

  1. System wide using Equalizer APO
  2. Player specific method
  3. ASIO driver output method
  4. Xonar cards specific method (3 pairs)

1. System wide using Equalizer APO

This method affects all applications (players, browsers, games). Does not work with ASIO playback output.

  1. Set “7.1 speakers” and “8 channels” in your sound card’s control panel.
  2. Download and install Equalizer APO.
  3. Select your audio card in the Configurator window.
  4. Launch Equalizer APO\Configuration Editor.
  5. Disable preconfigured filters by pressing the power button on each of them.

  6. Add new filter->Basic Filters->Copy (…).

  7. Click “Edit text” button on the newly created filter and insert after Copy: C=L SUB=R RL=L RR=R SL=L SR=R   and press Enter.

Thanks for Matt Gore the tip.


2. Player specific method

Some audio players can do this with the help of plugins.

foobar2000 example
  1. Set “7.1 speakers” and “8 channels” in your soundcard’s control panel.
  2. Install Matrix Mixer plugin in foobar2000.
  3. Go to foobar2000 Preferences->Playback->DSP Manager and activate Matrix Mixer.
  4. Configure Matrix Mixer as follows:


3. ASIO driver output method

If you card supports ASIO output playback and the player you want to use supports ASIO output playback then you could try this method. Configuration for each player is different. Below are some examples.

foobar2000 ASIO configuration example

1. Go to foobar2000 Preferences->Playback->Output->ASIO

2. Create a custom channel mapping with the following settings:

3. Go to Preferences->Playback->Output and under Device select ASIO followed by the custom channel mapping name you’ve previously created

AIMP ASIO configuration example

Go to AIMP preferences and set these settings:

4. Xonar cards specific method (3 pairs)

Xonar cards can output audio to up to 3 pairs of speakers though the use of the drivers. This method works with any player.

How to setup:

  1. This option requires “Stereo Upmix” option to be enabled when installing UNi Xonar drivers or that you enable it in XonarSwitch afterwards.
  2. In ASUS, Cmedia or XonarSwitch audio panels set: “2 channels” and “7.1 speakers”.


The post How to use one soundcard with up to 4 pairs of stereo speakers appeared first on MaxedTech.

Xonar best audio settings guide

$
0
0

Guide to achieve best audio quality, performance and functionality for Xonar cards and other CMI8788 audio chipset cards.

In sound card application settings (ASUS Audio Center, C-Media Panel, XonarSwitch):
  • Set Sample Rate at 44.1 kHz, this is generally good for most media (games, movies, music), while video DVDs use 48 kHz. Increasing Sample Rate without having a source that’s sampled at a higher rate won’t improve sound quality, in fact it will degrade it.
  • Select Audio Channel/System input (present only in Win Vista/7/8,10) and Analog Out/System Output settings based on the number of speakers that you have. For a 5.1 audio system select Audio Channel to 6 and Analog Out to 5.1. For a 2.1 audio system, select  Audio Channel to 2 and Analog Out to 2.  By default, selecting more channels than the number of speakers you have connected won’t enable you to hear more sounds or hear the footsteps and positioning of enemies better in games.
    • If you wish to emulate 8 channels surround on a 2 channel headphones you need to enable “Dolby Headphones” and “7.1 virtual speaker shifter” after setting the number of channels to 8 and analog output to “Headphones”.
  • Keep GX (or Xear 3D) disabled. GX is responsible with emulating EAX effects in some older games, but it’s know to cause crashes, audio loops in games and BSODs while it’s enabled.
  • Be careful which settings you enable. The effects will increase the DPC latency, which in turn could cause other problems like audio/video desynchronization or slow network/internet speed. They also change the sound not always in a good way, you might like it for your music but it might harm the audio positioning in games. You can read more on the impact of sound effects to DPC latency here.
In Windows:
  • Windows Vista/7/8/10: Setting the Windows audio playback to 24 bit will slightly improve audio quality. Right click on volume icon in tray, select Playback devices, double click your default playback device (for example Speakers ASUS Xonar Audio Device) , go to Advanced tab and in the Default format entry select 24 bit 44100 Hz (studio quality) as shown in this picture. You can find detailed information on audio bit-depth here.
  • Windows XP: Don’t increase the Windows Audio Volume to 100%, instead set it to 80-90% max in order to avoid dynamic volume issue. Issue regarding setting volume to 100% is detailed here.
In audio/video applications:
  • Enable the  audio output/playback to 32bit or 24bit instead of 16bit, as this will slightly improve audio quality. This setting is application specific  so you will have to search for it in application preferences/options. For example, in Winamp the setting is located in Preferences->Playback->Allow 24bit. If you have Windows Vista/7/8/10 then you have to enable 24 bit output in Windows as well.
  • If you use ASIO as playback output, recommended settings would be Bit-Depth set to 24-bit and Latency set to 10 ms.
  • Windows Vista/7/8/10 only: Set each application volume at 80-90% in order to avoid dynamic volume issue. Issue regarding setting volume to 100% is detailed here.
In games options:
  • Set Sound Quality to Medium or High depending on the importance of sound quality in that particular game. This setting affects CPU usage so if you have a slow CPU you should select Medium and if you have a fast CPU you can go with High. Setting this to High with a slow CPU might cause to much strain on your CPU and this in turn will affect the FPS of that particular game.
  • Set the number of speakers you currently have connected is properly detected.
    • If you’ve enabled Dolby Headphones 7.1 speaker emulation you have to set the number of speakers to 7.1.  The game needs to generate 7.1 sounds which will be processed and converted by the Xonar driver for 2 channels output.

The post Xonar best audio settings guide appeared first on MaxedTech.

Auxiliary audio applications list

$
0
0

List containing auxiliary audio applications and tools that could prove useful in enhancing the audio experience. Page will be periodically updated.

Audio enhancements

SoundLock Set the maximum output volume that sounds can be at. Useful to limit the volume of loud noises in movies or from other applications. Works on Windows Vista and newer.

ASIOConfig ASIO configuration viewer and changer that can be used when you can’t access the ASIO configuration through the audio player.

SoundVolume View Provides detailed view and control of Windows Volume Mixer entries. Allows a finer tune of applications volume levels and offers the ability to save them as different profiles. Works on Windows Vista and newer.

EqualizerAPO A parametric system-wide equalizer. Works on Windows Vista and newer.


HeSuVi Headphone Surround Virtualizations for Equalizer APO. Works on Windows Vista and newer.

ASIO4ALL Universal ASIO driver. Can be used instead of the ASIO driver included that’s included with audio card drivers or if a ASIO driver is not included with your audio card drivers.

MicMute Mute microphone with a keyboard shortcut or make it work only when you press as key (push-to-talk for any application).


Audio testing

RightMark Audio Analyzer Test the audio performance of the sound card or speakers. Using a audio loop cable you can test the audio performance of your sound card and between various playback settings. Can test various playback outputs DirectSound, ASIO or Win Sound(WASAPI) at different playback settings (sample rate, bit rate). Can be used to test the frequency response of speakers.

Tip: If latest version crashes you could try a older version like v6.4.1 or v6.3.0.

Tip: Settings for sound card benchmark. Full setup guide here.

Room EQ Wizard Software for measuring and analyzing room and loudspeaker responses. The audio analysis features help you optimize the acoustics of your listening room, studio or home theater and find the best locations for your speakers, subwoofers and listening position.

Audacity Audio editor, recorder and analyzer. Can reduce or isolate vocals.  Add various audio effects.

Can be used to measure input latency for an audio card and its drivers and between multiple recording inputs MME, DirectSound or WASAPI (guide).


The post Auxiliary audio applications list appeared first on MaxedTech.

Fix microphone not working in Windows 10 1803 (April 2018 update)

$
0
0

With Windows 10 version 1803 (April 2018 update), Microsoft changed the behavior of microphone app access setting so that it affects desktop applications as well.

To fix this do the following:

1. Go to Windows settings and select Privacy

2. Select Microphone and switch on the “Allow apps to access your microphone” toggle.

3. Restart those applications where you’ve wanted to use the microphone.

4. (Optional) To block apps access to microphone you will have to toggle microphone off for each app. You will have to do this after each new app you install.

Useful for Skype, TeamSpeak, Discord, WhatsApp, Steam Voice chat, OBS Studio, Adobe Audition, Audacity etc.

Thanks to Shane for the tip.

The post Fix microphone not working in Windows 10 1803 (April 2018 update) appeared first on MaxedTech.

Pointer Shadow Re-enabler

$
0
0

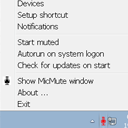
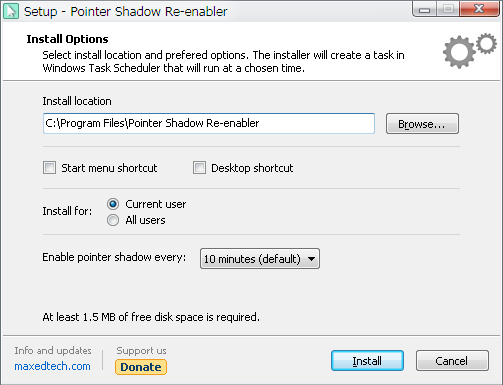
Pointer Shadow Re-enabler is an application that periodically re-enables mouse pointer shadow if it was disabled. It is useful in those situations where a application or game disables Windows pointer shadow and neglects to enable it back once it’s closed. Dota 2 is an example of game that does this.

After installation the mouse pointer shadow will be periodically enabled at user set times through a task created in Windows Task Scheduler.

Pointer Shadow Re-enabler is lightweight and there is no measurable performance impact when it runs.

Supported OS:

  • Fully supported: Windows Vista, Windows 7, Windows 8, Windows 8.1, Windows 10, Windows Server 2008, Windows Server 2012 and Windows Server 2016.
  • Partially supported (only enable on demand): Windows XP and Windows Server 2003.

Below a screenshot with the install options:

DONATIONS

If you find the application useful and want to support us you can do make a small donation (min. $2 due to fees) here.

FAQ

1. How to set different settings?

Launch the installer again. Previous configuration will be overwritten with the new settings.

2. Does silent or unattended installation work?

Silent installation is partly supported through the use of /SILENT or /VERYSILENT flags and will install with default settings. In a future version unattended configuration file might be supported.

3. My antivirus says that the installer or one of the contained files is a virus or trojan.

Unfortunately these days antivirus companies classify anything new as malware/trojan/virus especially if the software isn’t digital signed (which is costly). The process of fixing the false positive detection is a lengthy one and problematic. Some companies like McAfee and TrendMicro refuse to make the correction even after being provided with the files and explanation of what they do, worse, you can’t even speak with someone to reconsider their classification. Other companies like Microsoft, flag the files as malicious if you run them on system with Windows Defender even after you’ve submitted them as false positive and their online scanner and their analyst do not classify them as malicious.

If you’ve downloaded the drivers from the official links then the virus warning is a false positive. While it’s highly unlikely that the installer would be compromised and be infected with viruses, if you really want to be sure then you can submit the driver package for analysis to www.virustotal.com for a wider analysis.

Version history

v1.00 [10 May 2018] – Initial version

Download v1.00


The post Pointer Shadow Re-enabler appeared first on MaxedTech.

Viewing all 34 articles
Browse latest View live